

Creating a Continuous campaign
The Continuous campaign (or evergreen) works differently from the other types: instead of starting from a search or a list, it stays always active, waiting for leads — and runs automatically on each lead that comes in.
It is never completed. Leads can come from two sources:
- Monitoring — leads linked automatically from the profiles you monitor;
- Manual addition — leads linked by you, through individual searches on the platform or the Chrome extension.
💡 Typical use: the Continuous campaign is usually used together with some automated monitoring (Monitoring menu). You monitor strategic profiles — for example, in an ABM strategy — and every lead identified drops straight into the campaign, with no manual action.
Before you start
- Have a LinkedIn account connected — see Connecting Channels;
- Have the AI agent that will work on the campaign set up — or use the Start without an agent shortcut, described below;
- To feed the campaign automatically, set up your Monitoring.
Creating the campaign
In the LinkedIn area, click New Campaign and, under Contact source, choose Continuous campaign. The Review and create screen opens.
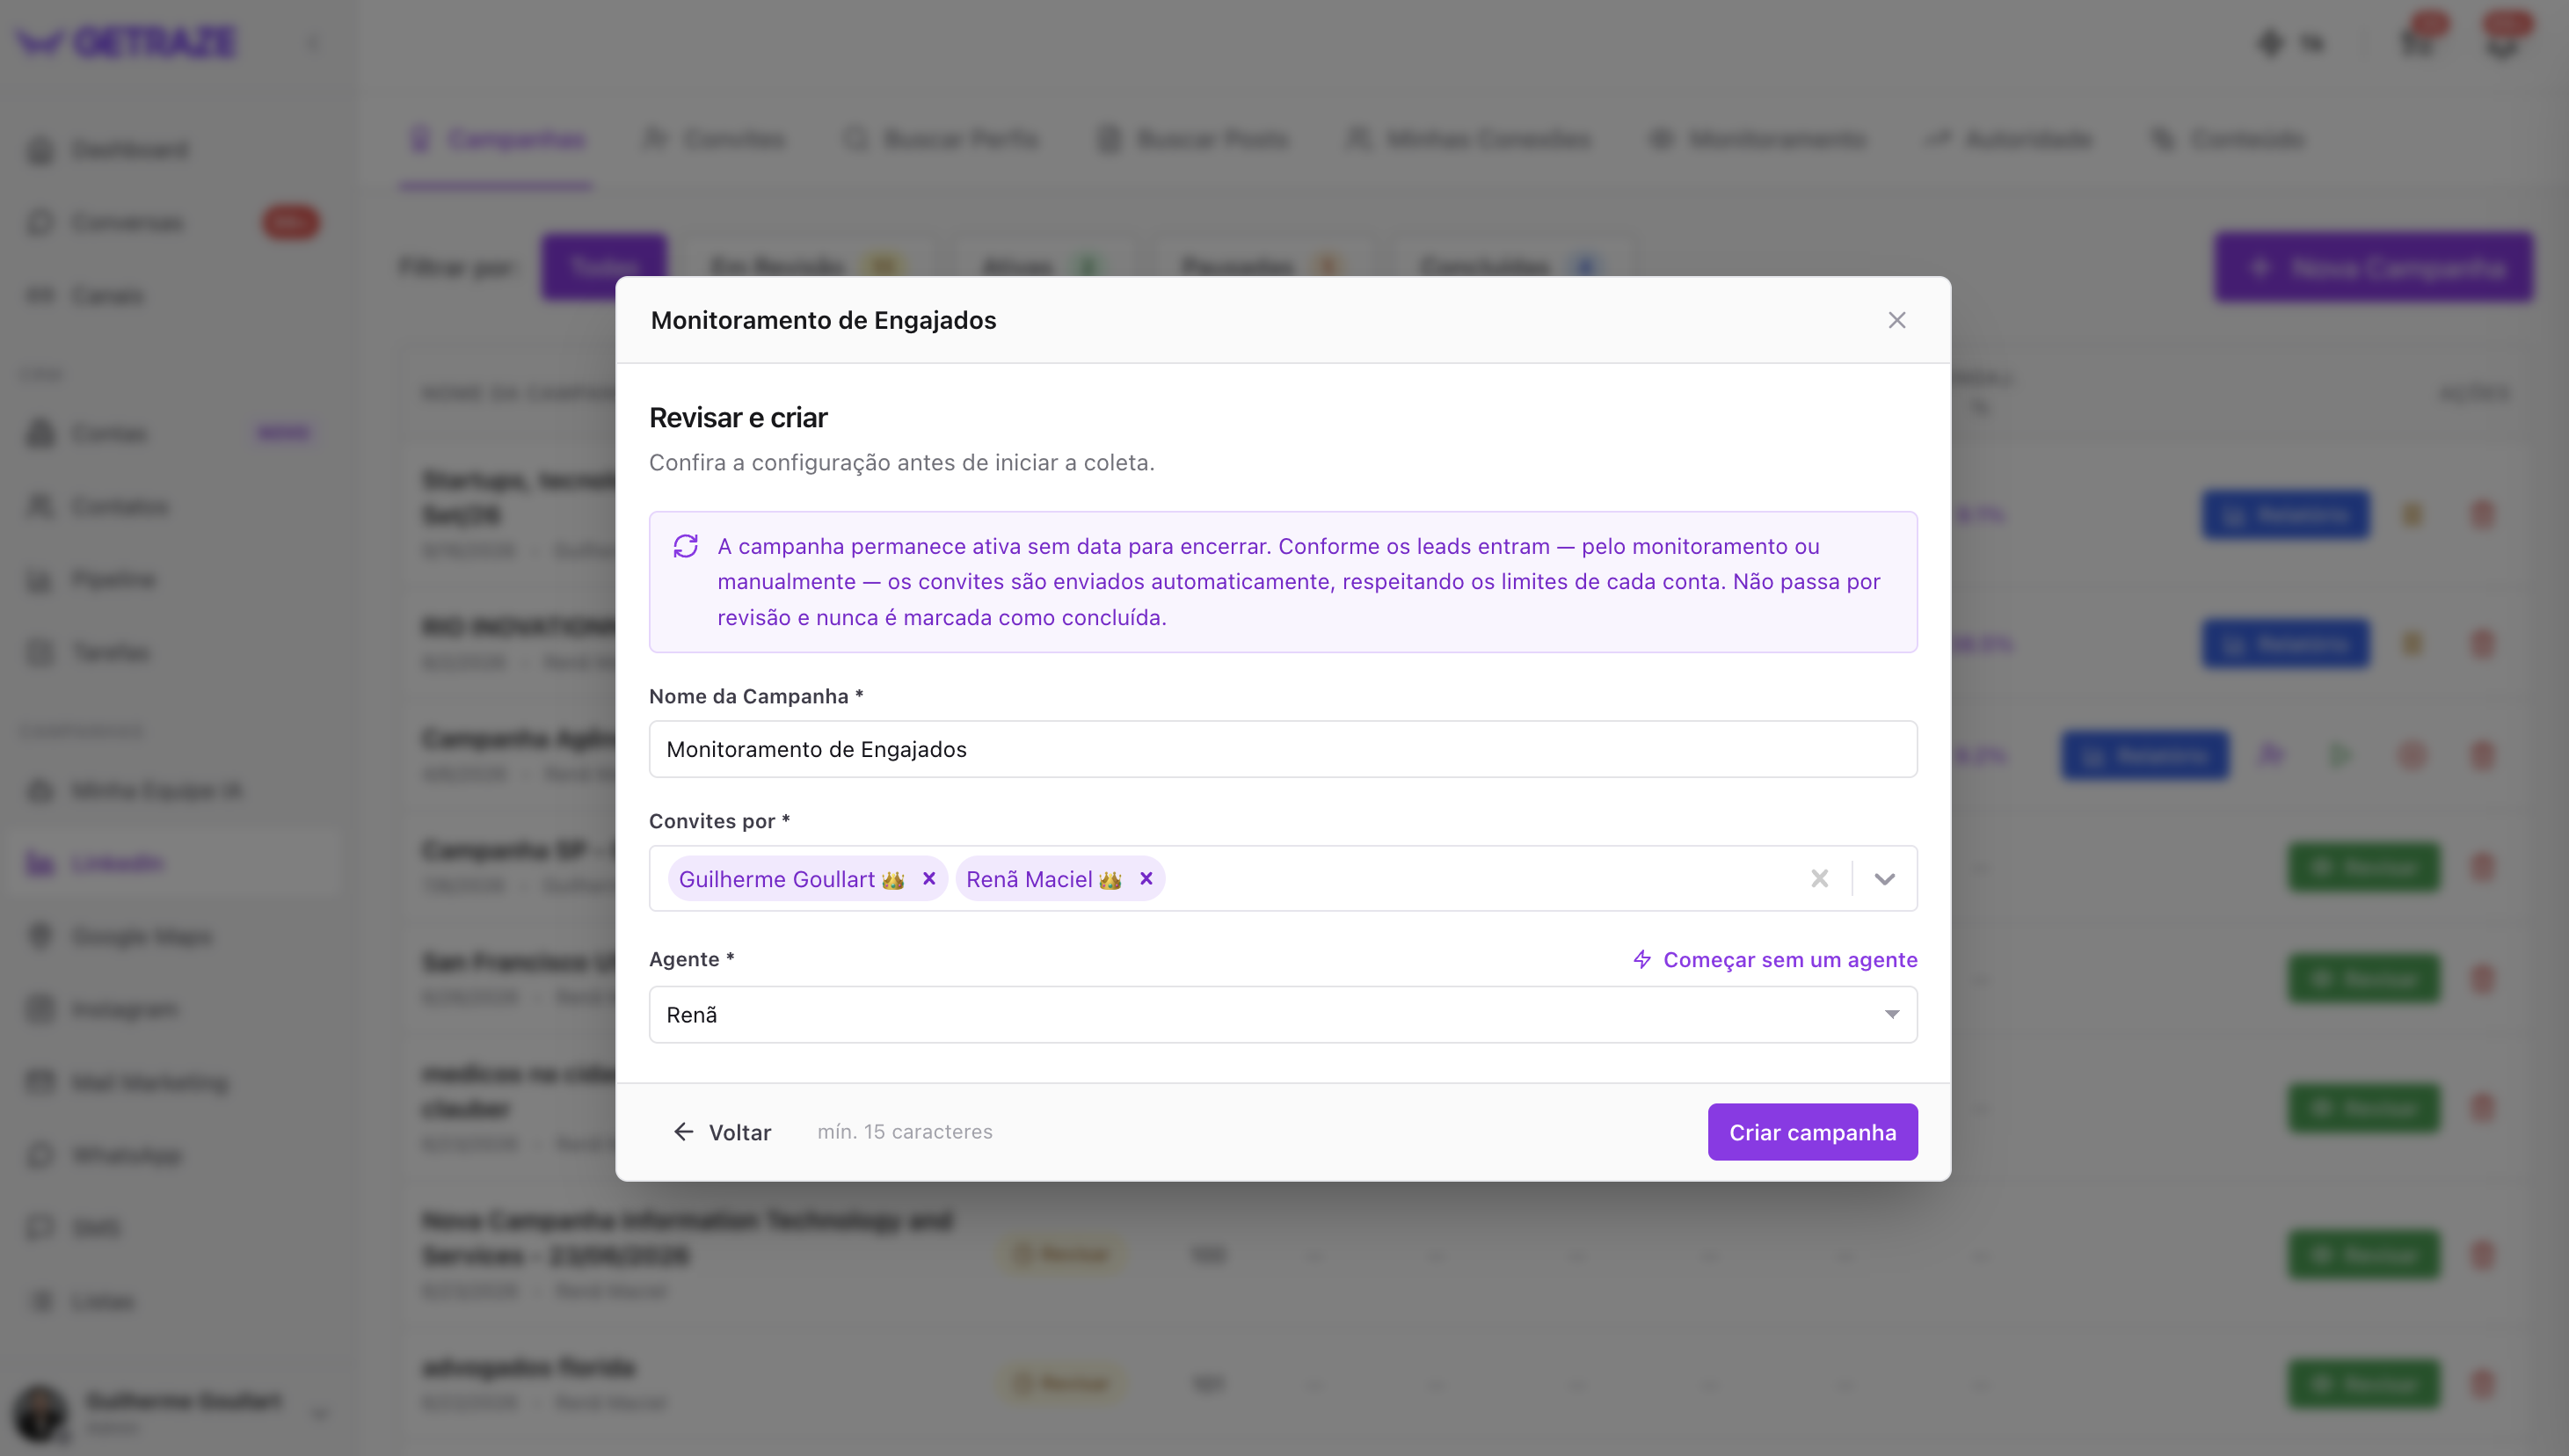
Before the fields, the screen itself sums up how this campaign behaves:
🔄 The campaign stays active with no end date. As leads come in — from monitoring or manually — invites are sent automatically, respecting each account's limits. It does not go through review and is never marked as completed.
Fill in:
- Campaign Name.
- Invites from — the LinkedIn accounts that will take part. You can select more than one.
- Agent — the AI agent that will work on this campaign.
- Click Create campaign. Done! ✅
💡 When you select more than one account in Invites from, invites are distributed evenly across them, always respecting each one's limit.
Start without an agent
If you don't have an agent ready yet, click ⚡ Start without an agent, next to the Agent field. GetRaze builds a simple funnel on the spot — invite + thank-you + distribution — and the campaign runs without AI, creating a basic agent that you can evolve later.
It is the same window used in the Find new people campaign: days to wait before discarding the invite, pre-invite message, welcome message after acceptance, lead destination in the CRM, tags and owner. The fields are detailed in Start without an agent.
How to know it worked
- The campaign shows up in the Campaigns list with the name you set and the Active continuous status — and stays that way, since it is never marked as completed;
- From then on, it is ready to receive leads coming from monitoring or individual searches — and run automatically on each one.
Common issues
I created the campaign, but nothing happens
The Continuous campaign does not look for leads on its own — it waits for leads to be linked to it. Check whether you have an active Monitoring pointing to the campaign, or link leads manually through individual searches or the Chrome extension.
Next steps
- Set up Monitoring to feed the campaign automatically;
- Install the Chrome extension (tutorial coming soon) to link leads while you browse LinkedIn;
- Track the execution in the Campaign report.