

Exploring the pipeline's top menu
The pipeline's top menu holds your day-to-day CRM tools: searching and filtering opportunities, switching between views, analyzing funnel conversion, exporting and importing, and creating new opportunities.
In this guide, we go through each one of those options.

Search
Use the search area to quickly find an opportunity. You can search by:
- Lead name;
- Email;
- Phone;
- Other contact data.
As you type, the pipeline filters down and shows only the matching opportunities.
Filters
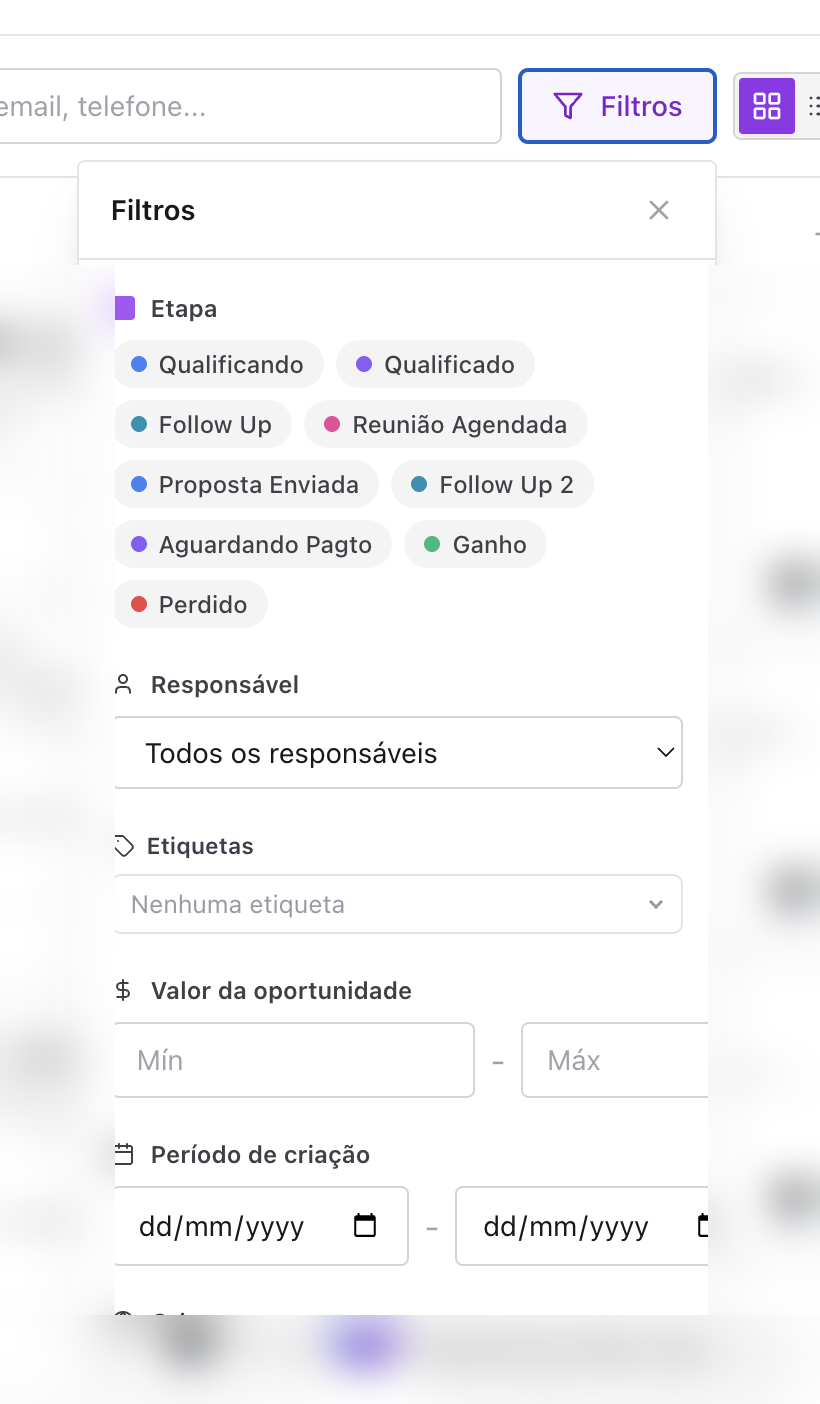
Clicking Filters gives you additional filters to refine the view further:
- Tags;
- Opportunity owner;
- Funnel stage;
- Opportunity value;
- Creation period;
- Lead source;
- Contact has or does not have an email;
- Contact has or does not have a phone.
💡 Tip: combine filters to build precise slices — for example, opportunities from a specific owner, created last month, that still have no phone on file.
Views: Kanban, List and Funnel
By default, the pipeline shows as a Kanban — columns per stage, with the opportunity cards. In the top menu, you can switch to two other views:
List
Shows your opportunities as a list, ideal for whoever prefers working with the information in rows, like a table.
Funnel
The Funnel view is where you best understand your pipeline's data.
The five indicators
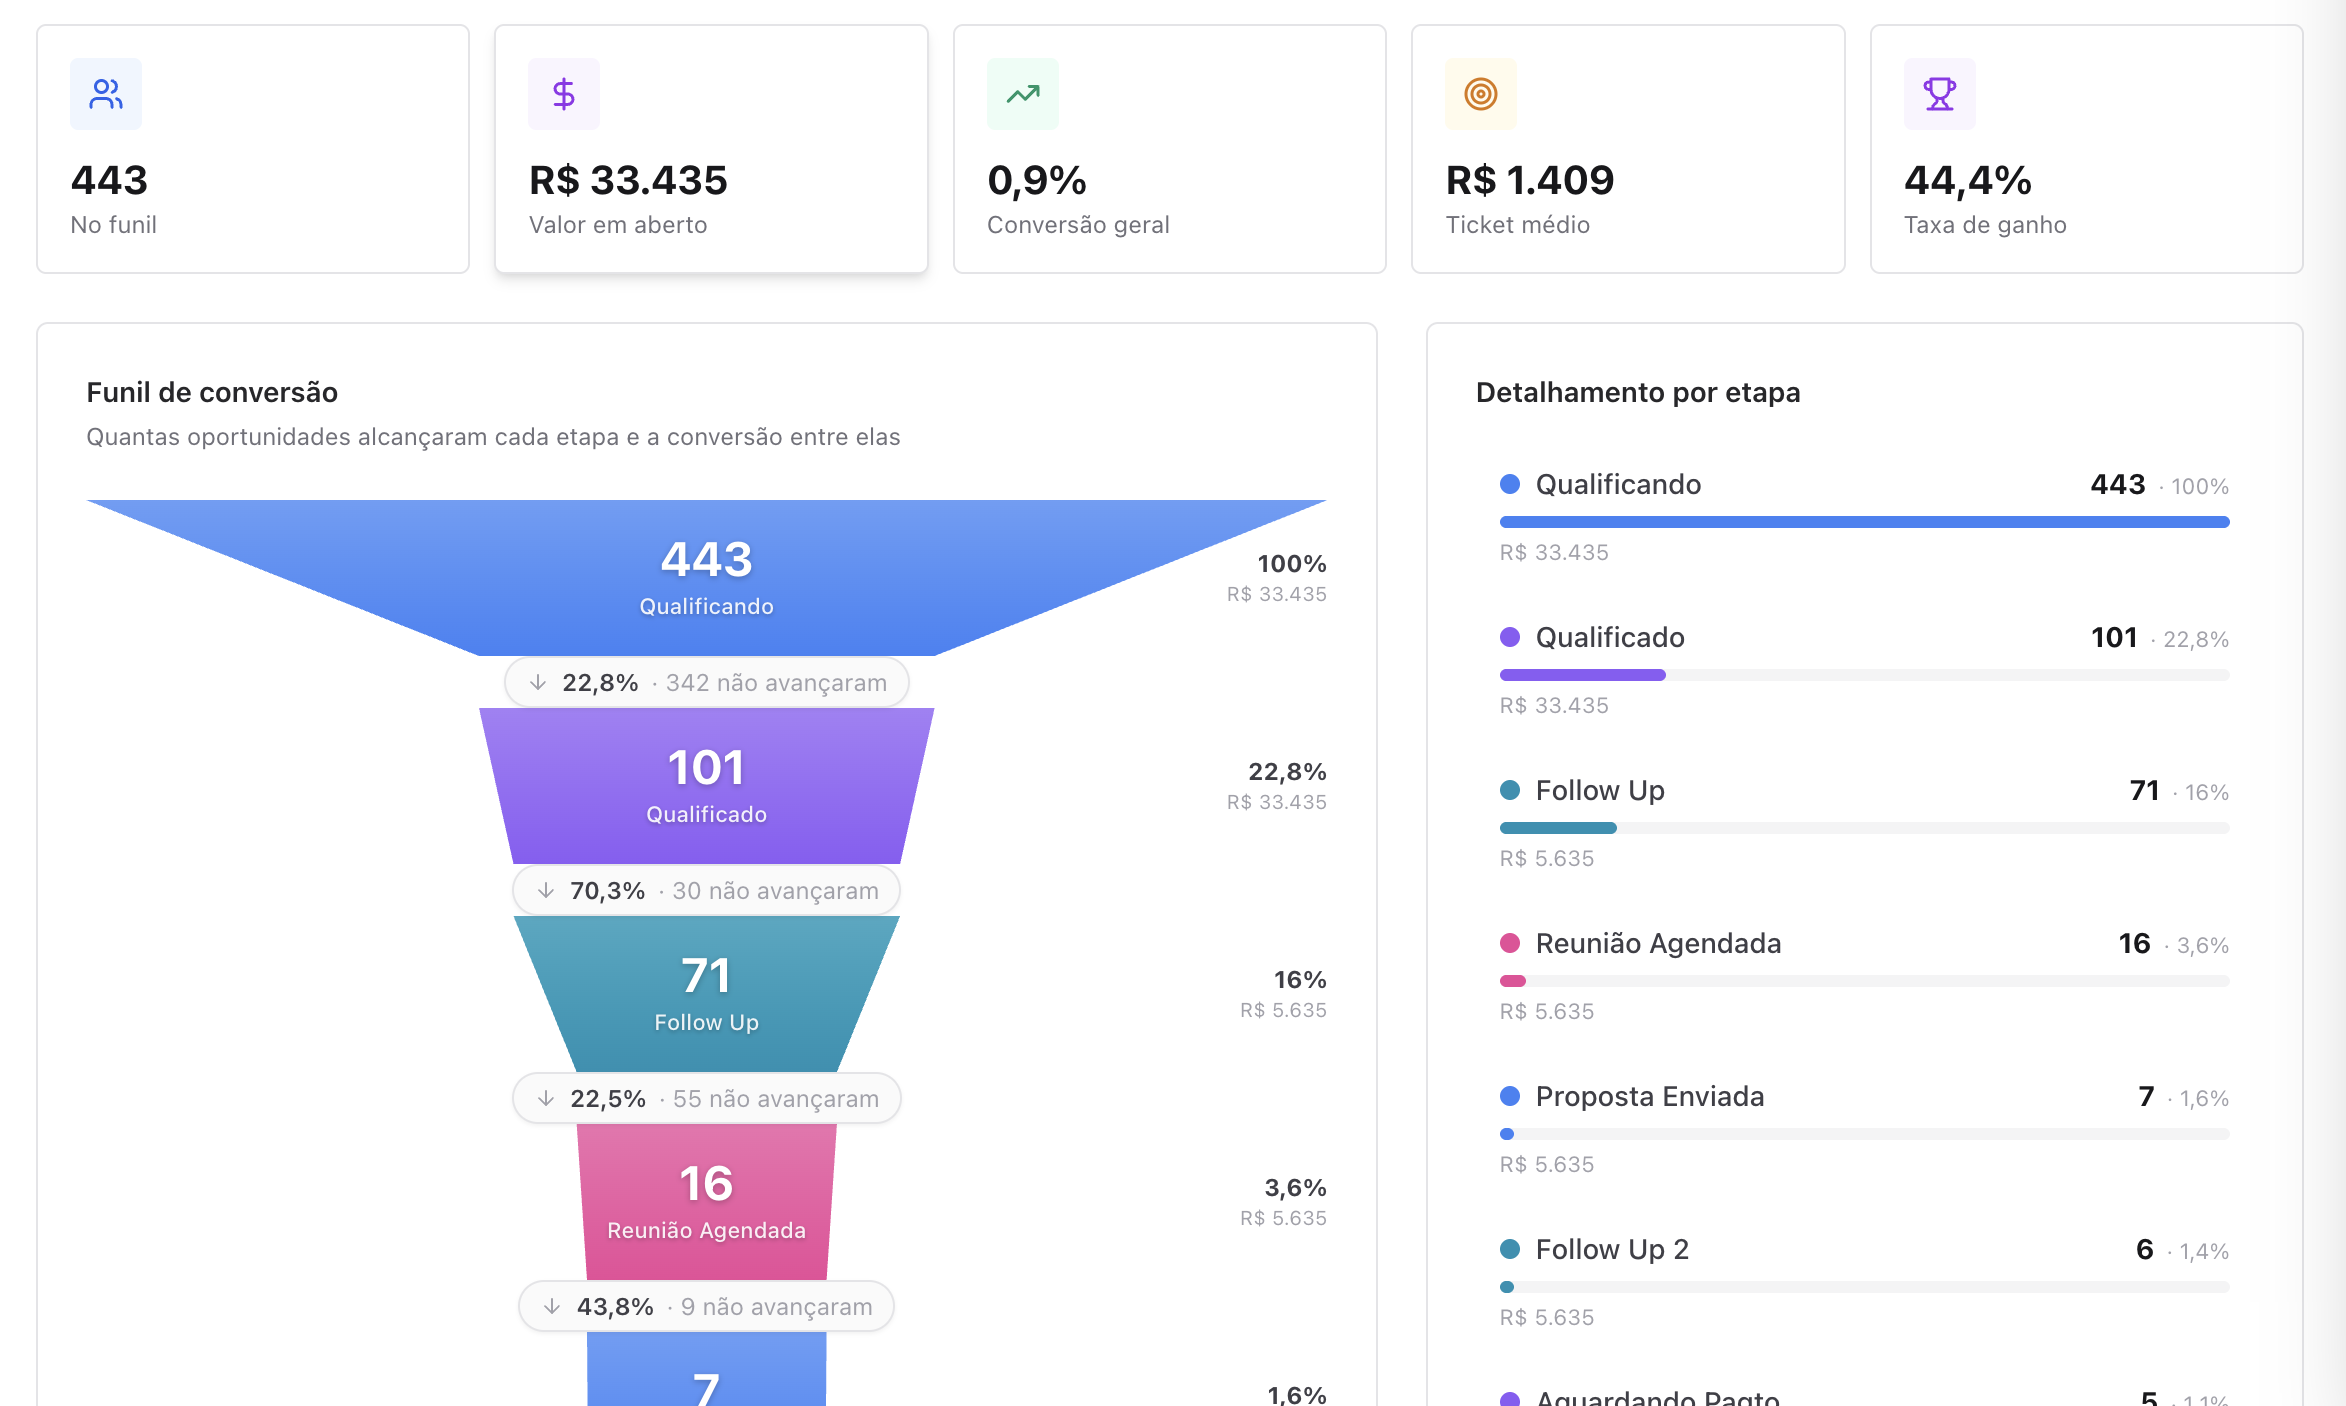
At the top, the quick read of the pipeline: In funnel (how many opportunities), Open value, Overall conversion, Average deal size and Win rate.
Conversion funnel
The chart shows how many opportunities reached each stage and the conversion between them. Each band carries the count, the percentage of the total and the accumulated value. Between one band and the next, the platform reports that step's conversion and, beside it, how many did not move on.
Per-stage breakdown
On the right, the same read as a list: each stage with its count, percentage and value.
You also define the period analyzed and whether the dates considered are the opportunities' movement or creation dates.
💡 Use the Funnel to spot bottlenecks: the "did not move on" number between two stages is the most direct one — that is where your sales process is losing people.
Export CSV
The Export CSV button downloads the pipeline's opportunities as a spreadsheet. It opens a window with two tabs: New export and History.
Under New export you choose which columns go into the file — there is a search by column name, shortcuts to tick or untick an entire group, and the Default and All buttons.
⚠️ The export follows the filters applied on screen. The CSV brings the slice you are looking at, not the whole pipeline — if you want everything, clear the filters before generating it.
Click Generate CSV. The export runs in the background: the file appears under History when it is ready, and the download starts on its own. You can close the window and come back later.
Import
The Import button opens the lead import area with this pipeline already chosen as the destination — you are looking at it, so the platform does not ask again.
It is also where the import history lives, which answers "where did this lead come from?" and lets you discard import drafts left along the way.
💡 The button only appears for whoever has permission to import contacts.
New opportunity
The purple + New Opportunity button creates an opportunity directly in your pipeline.
Pipeline settings
The gear icon, in the right corner of the bar, opens Pipeline Settings — name, stages and permissions.
Next steps
- Use the Funnel view periodically to track your conversion rates;
- Set up tags and owners to get the most out of the filters.