

CRM Pipelines
In GetRaze, CRM pipelines are structured in an organized, scalable way, on two levels:
- Projects — they work as headings that group your pipelines. They can represent acquisition channels, company names or any organization that makes sense for your business;
- Pipelines — the sales funnels themselves, with their stages, living inside each project.
This guide shows how to create a project, create your pipeline and configure it completely.
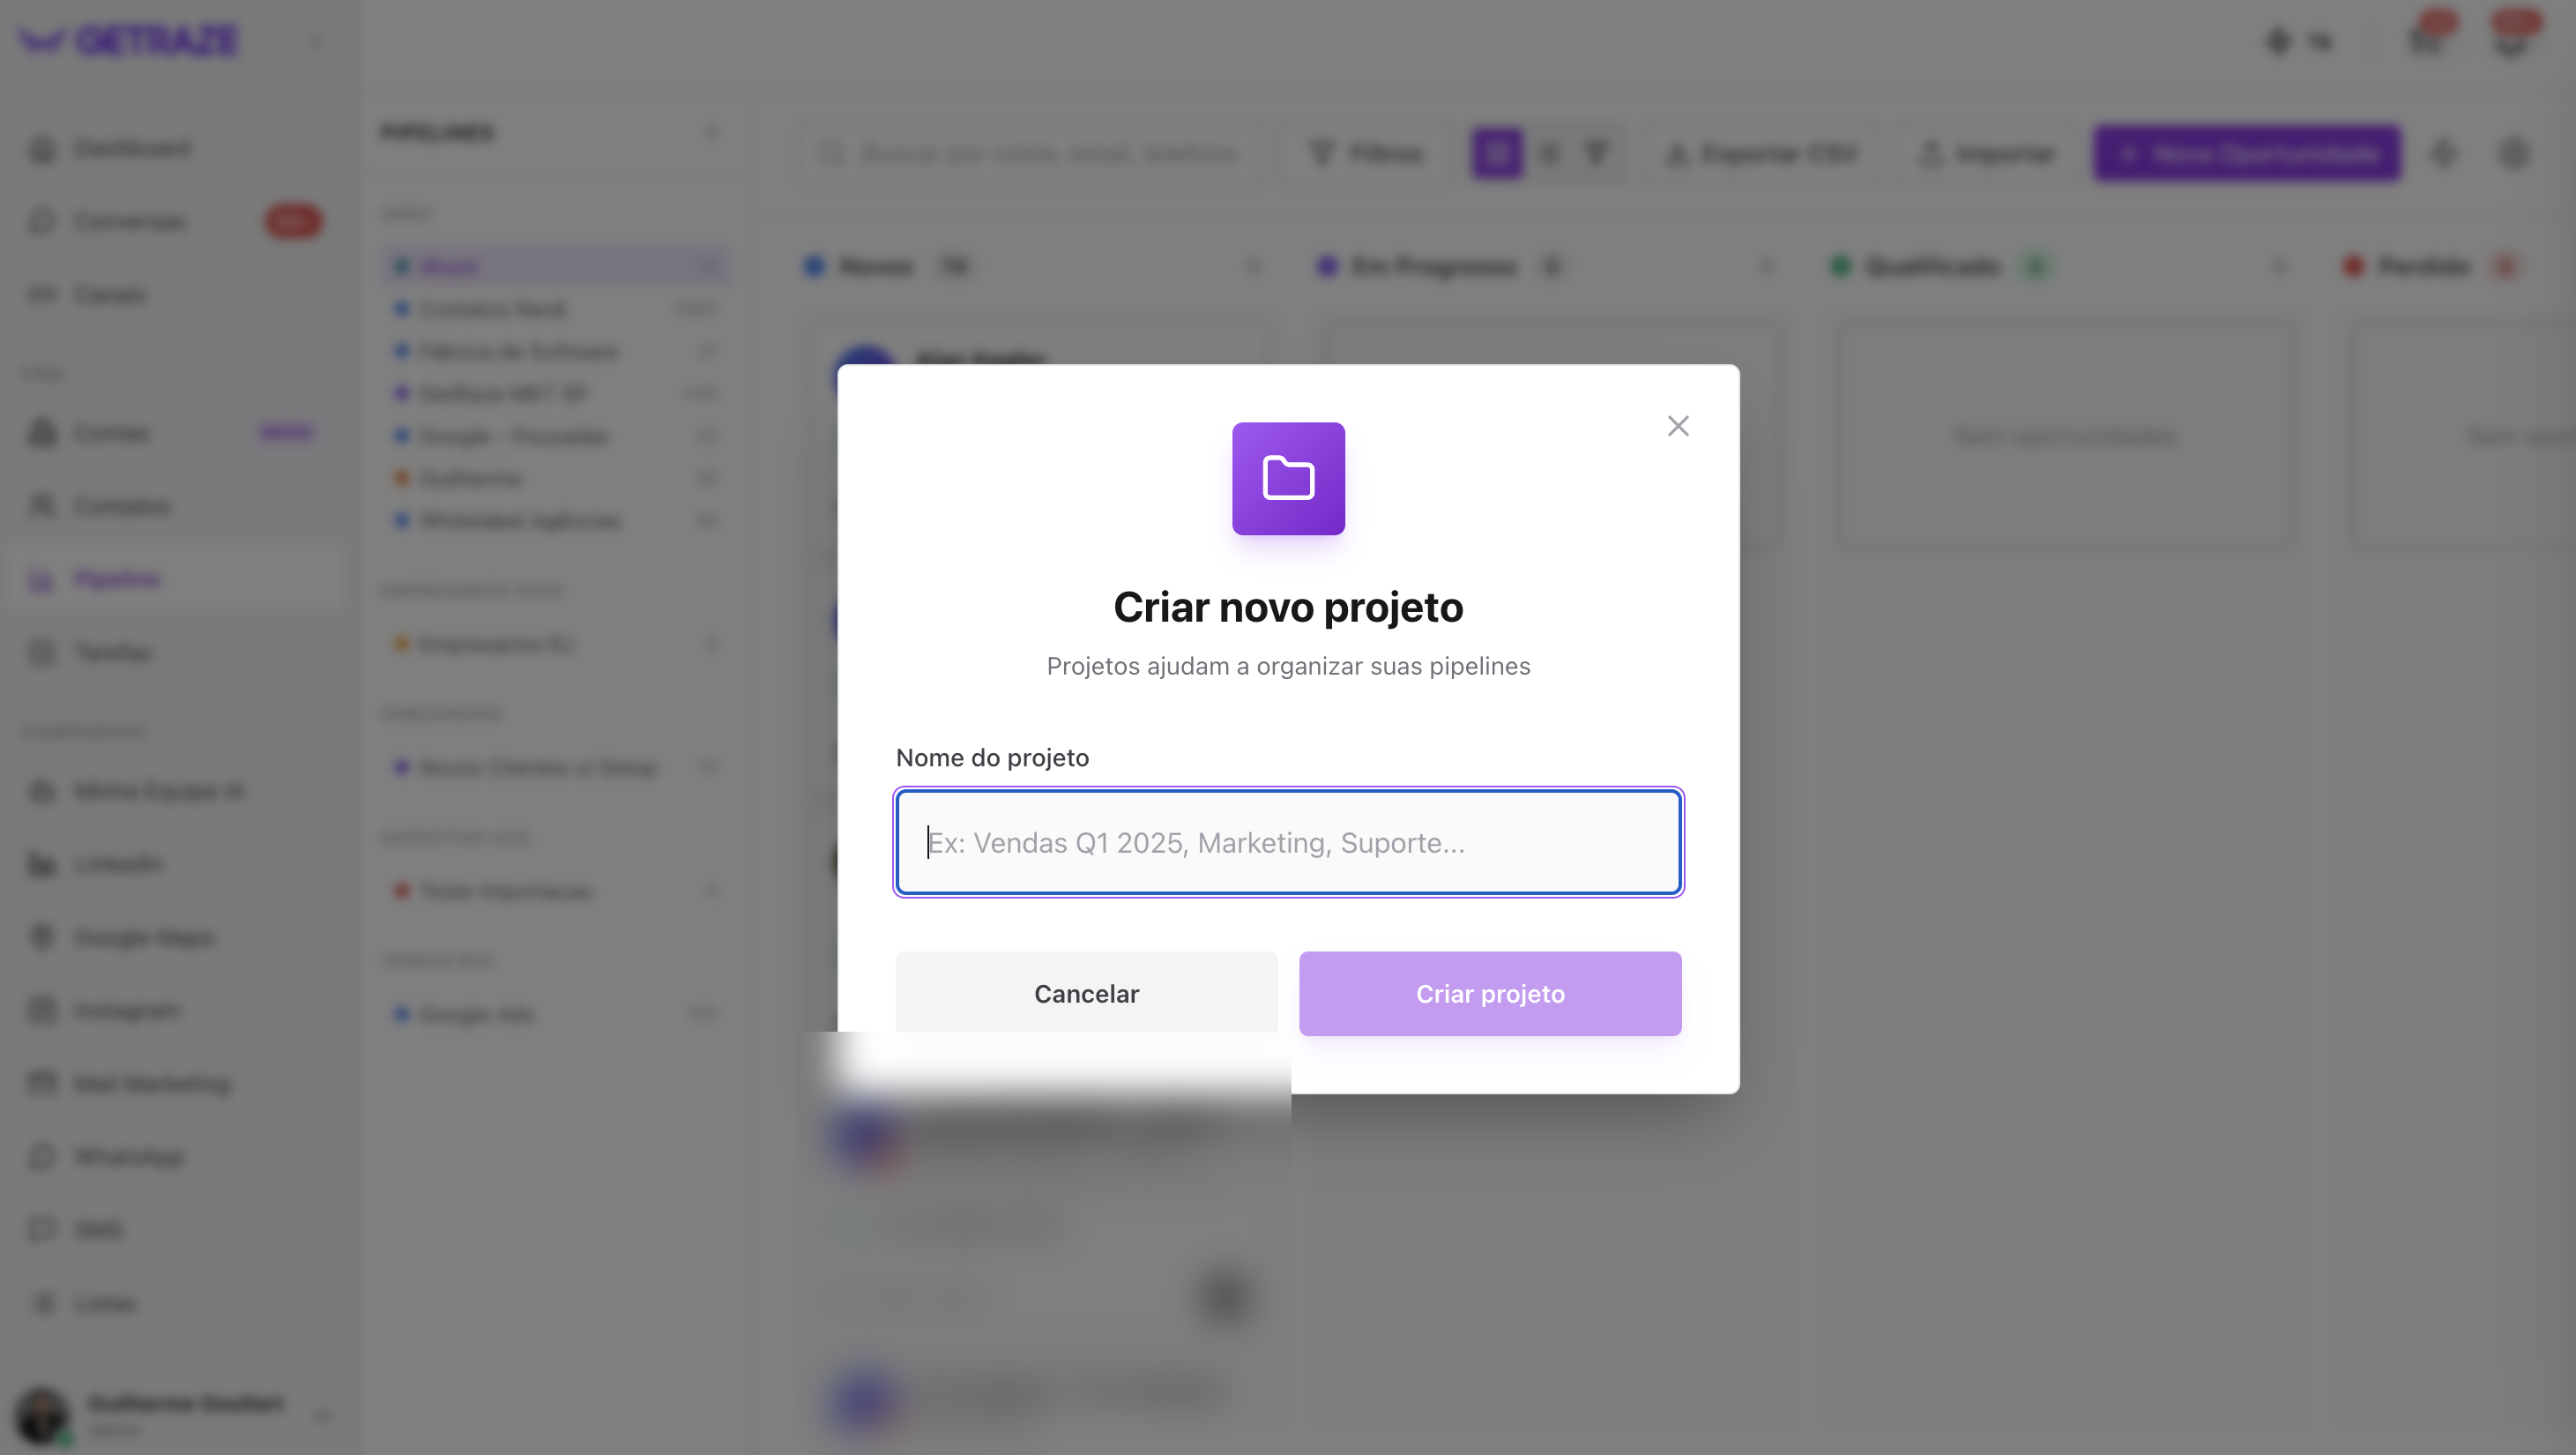
Creating a project
- In the side menu, next to Pipelines, click the + button.
- In the window that opens, type a name for your project.
- Click Create project.
Done — the project appears in the menu as a heading, and that is where your pipelines will live. ✅
Creating a pipeline
- Next to the project name, click the three dots menu and then New pipeline.
- The pipeline configuration screen opens.
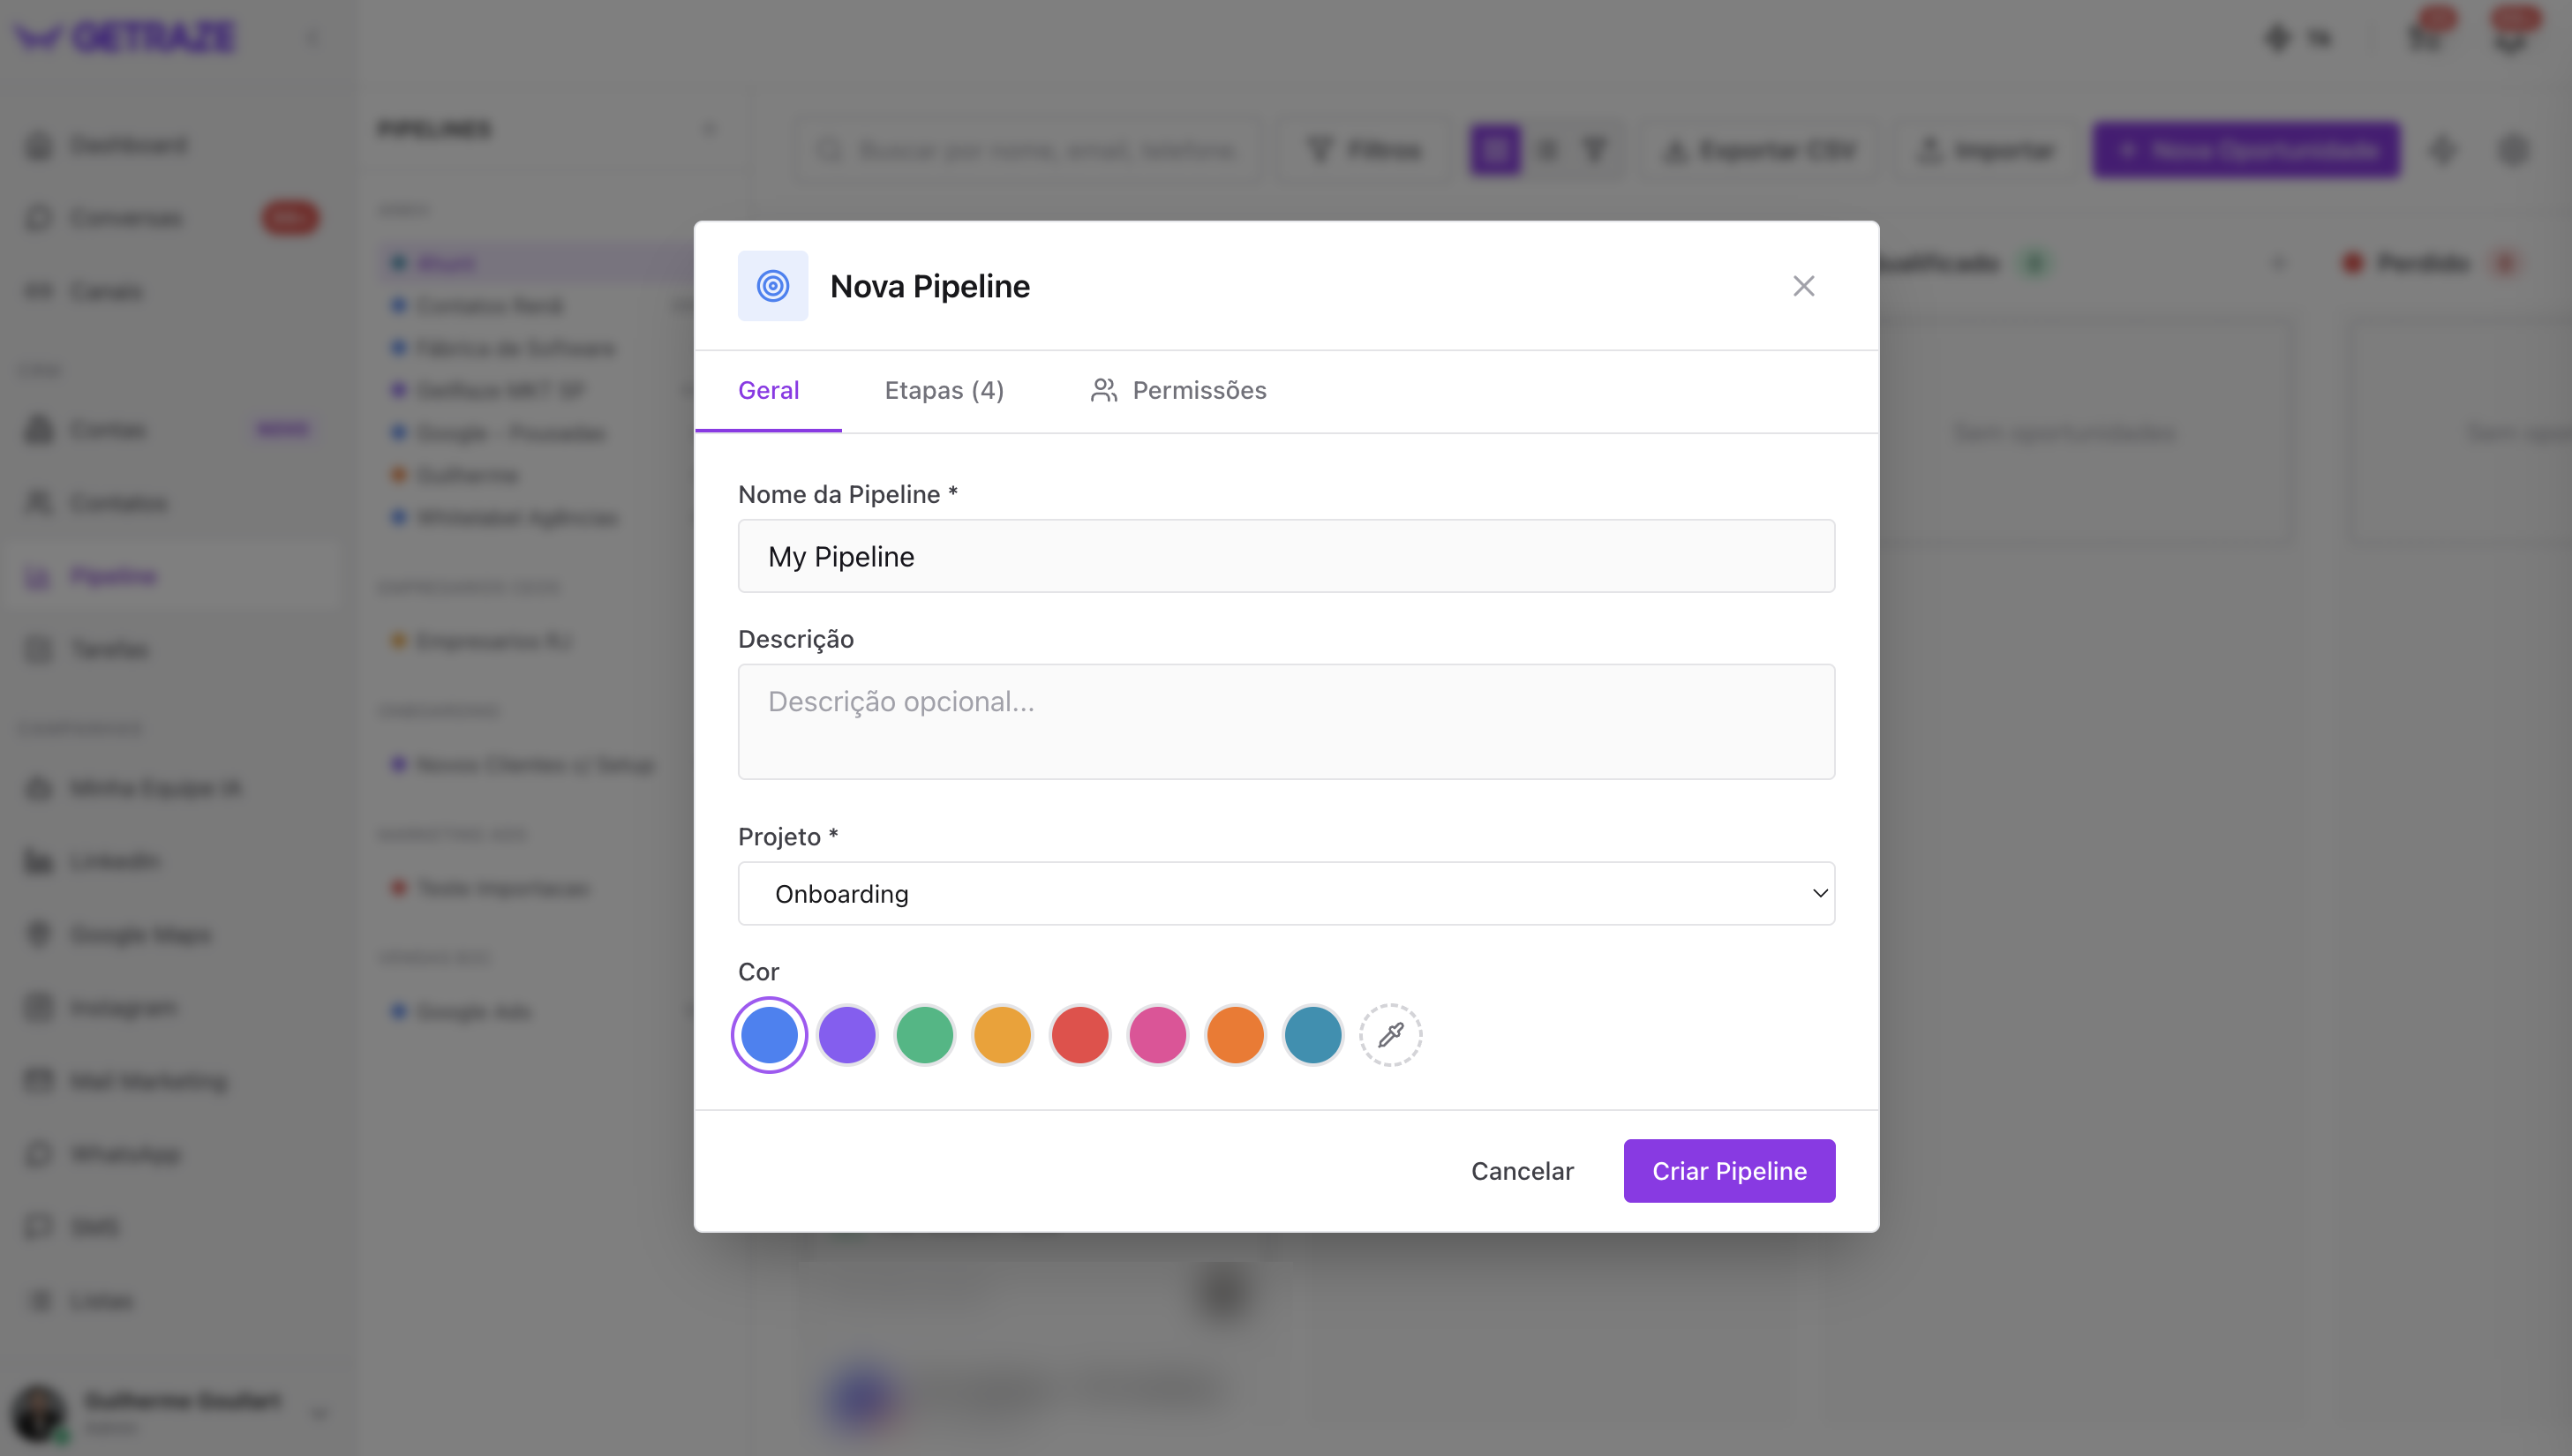
General tab
- Name — type your pipeline's name;
- Description (optional) — a quick context about the funnel;
- Project — choose which project it belongs to;
- Color — pick one of the palette colors, or use the eyedropper to define a custom color. It is what identifies the pipeline in the menu.
Stages tab
Here you define which stages your sales funnel will have.
To speed things up, GetRaze already offers ready-made templates:
- Standard B2B sales
- LinkedIn prospecting
- Simple sales
- Consulting and services
When you click a template, all of its stages are loaded — and you can reorder them as you prefer.
⚠️ Important: your pipeline needs at least one Won stage and one Lost stage.
Permissions tab
You can tick the option to restrict access, so only selected users see the pipeline.
💡 Selecting users and their permission levels only becomes available after the pipeline is created, on the edit screen. See how to do it in the Editing the pipeline section below.
Finishing
Click Create pipeline. It appears in the menu, below your project's name, fully working and configured the way you defined. ✅
PRINT AQUI #1
Side menu with the newly created pipeline listed below the project name.
Editing the pipeline
To edit a pipeline that already exists, open it and click the gear ⚙️ icon on the right, which opens Pipeline Settings. There you find every option to configure your pipeline further.
General tab (when editing)
Beyond the basics (name, description, project and color), here you get the advanced settings:
Entry agent
Define an AI agent that will reach out proactively, over WhatsApp, to any contact entering this pipeline. Ideal for making sure no lead goes without a first contact.
💡 Transfer to another pipeline on win is no longer an option here and became an automation, under Automations: the Deal won trigger (narrowed to this pipeline) and the Move to stage action, pointing at the destination funnel's stage. Turn on Reopen at destination for the card to arrive there as an open deal.
Delete pipeline
This is also where the option to permanently delete the pipeline lives.
⚠️ Careful: deletion is permanent and also removes every opportunity linked to the pipeline. This action cannot be undone.
Stages tab (when editing)
Manage your funnel's stages freely:
- Reorder the stages;
- Rename existing stages;
- Change the colors;
- Add new stages;
- Delete stages.
Permissions tab (when editing)
This tab has three switches and, below them, the list of who has access.
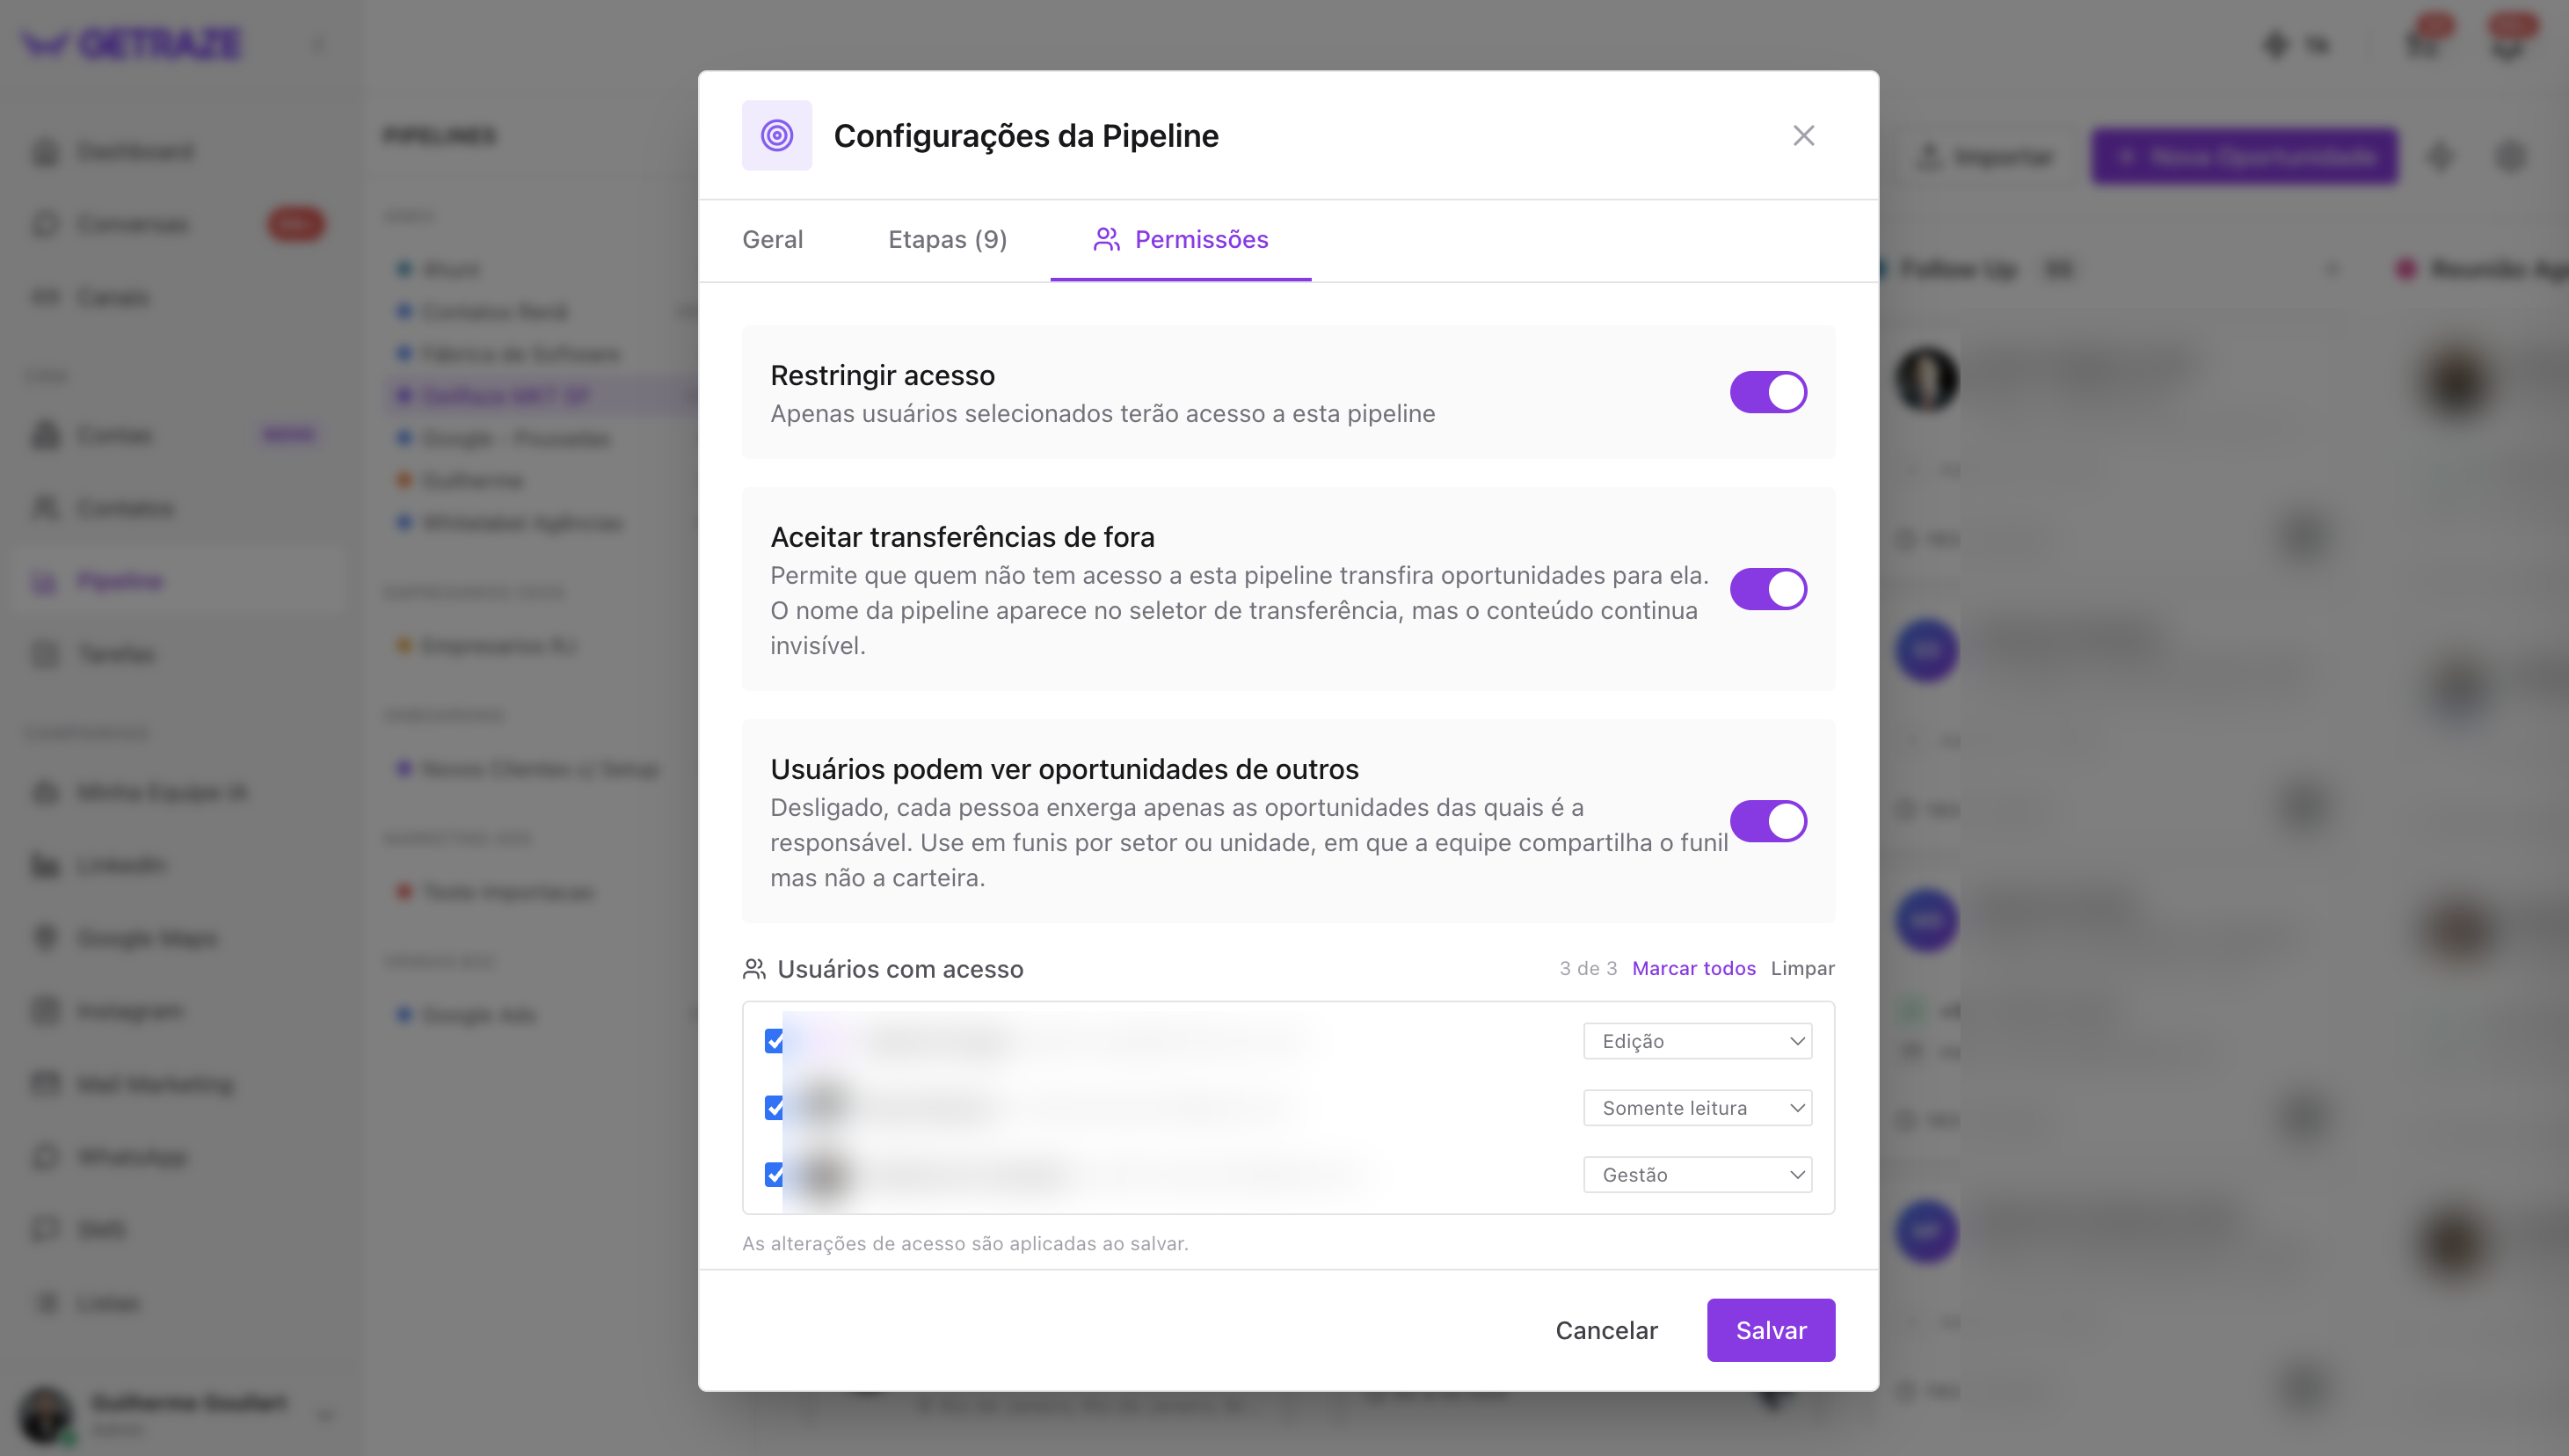
Restrict access
Turn it on so only selected users have access to this pipeline. While it is off, everyone in the account keeps seeing everything, and the access levels do not apply.
Accept transfers from outside
Lets people who do not have access to this pipeline transfer opportunities into it. In practice: the pipeline's name shows up in those people's transfer selector, but its content stays invisible.
💡 Example: a pre-sales team can transfer qualified leads into the closers' restricted pipeline, without seeing the deals happening inside it.
Users can see other people's opportunities
When off, each person sees only the opportunities they own — even with access to the pipeline. When on, everyone in the pipeline sees every deal in it.
💡 This is the switch for funnels by sector or branch, where the team shares the funnel but not the book of business: everyone works in the same pipeline, each seeing only their own deals.
Users with access
Below the switches is the list of everyone in the account, with a counter of how many are ticked and the Select all and Clear shortcuts.
For each person: tick the box to grant access and choose the level in the selector on the right.
| Level | What it allows |
|---|---|
| Read-only | View the pipeline and its opportunities, without changing anything |
| Edit | Work on the pipeline's opportunities |
| Manage | Full control, including the pipeline's settings |
Whoever creates a restricted pipeline becomes the Owner, marked with a crown icon. That level does not appear in the selector and cannot be removed or downgraded by anyone else — not even by someone with Manage. On top of everything Manage allows, the Owner can delete the pipeline.
⚠️ Access changes are only applied when you save. Closing the window before clicking Save discards what you changed.
How to know it worked
- Your pipeline appears in the side menu, below the project name;
- When you open it, the configured stages show up as kanban columns, ready to receive opportunities.
Common problems
The user selection does not appear on the Permissions tab
While creating, only the access restriction tick is available. Selecting users and their permission levels only appears after the pipeline is created, under the gear ⚙️ menu → Permissions tab.
I cannot save my stages
Check that your funnel has at least one Won stage and one Lost stage — both are required.
Next steps
With your pipeline configured, you can now:
- Add your first opportunities;
- Set up an entry agent to reach out to new contacts automatically;
- Connect your prospecting campaigns to feed the funnel.